
We have all had such experiences, after work or on business trips, the office computer is always forgotten to be turned off! It’s quite annoying! If the computer is often left on, it not only wastes electricity but is also unsafe, providing enough time for network attacks, and leading to information leakage and security risks.
As long as we add an automatic scheduled shutdown task in the computer, we can solve this problem once and for all.
Below, we share the specific implementation steps. (Using Windows 11 as an example).
Automatic Scheduled Shutdown Operation Steps
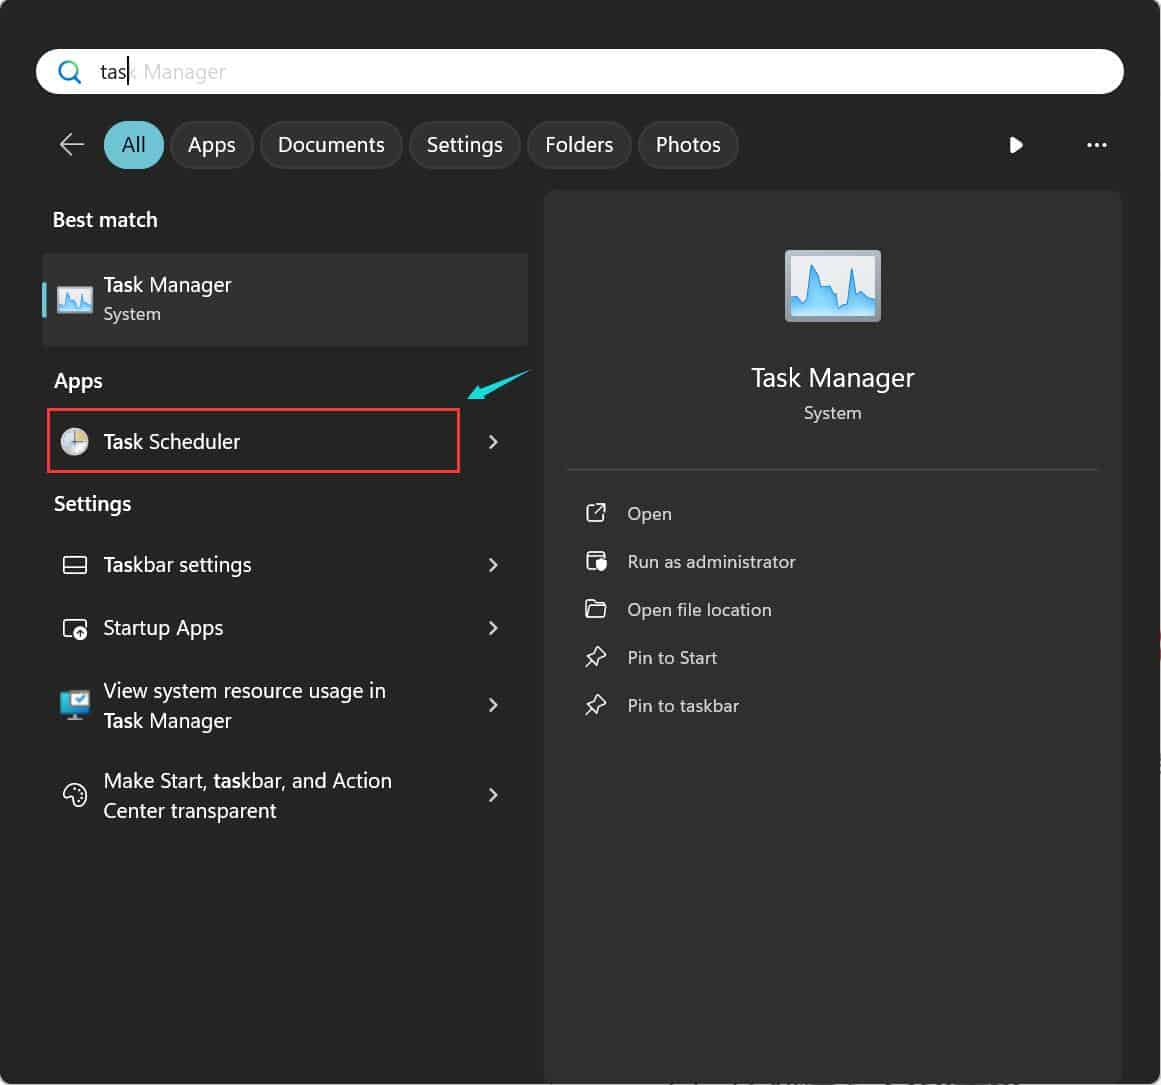
1. Open the “Task Scheduler” application. You can find it in the “Start” menu or type “Task Scheduler” in the search bar and open the application.
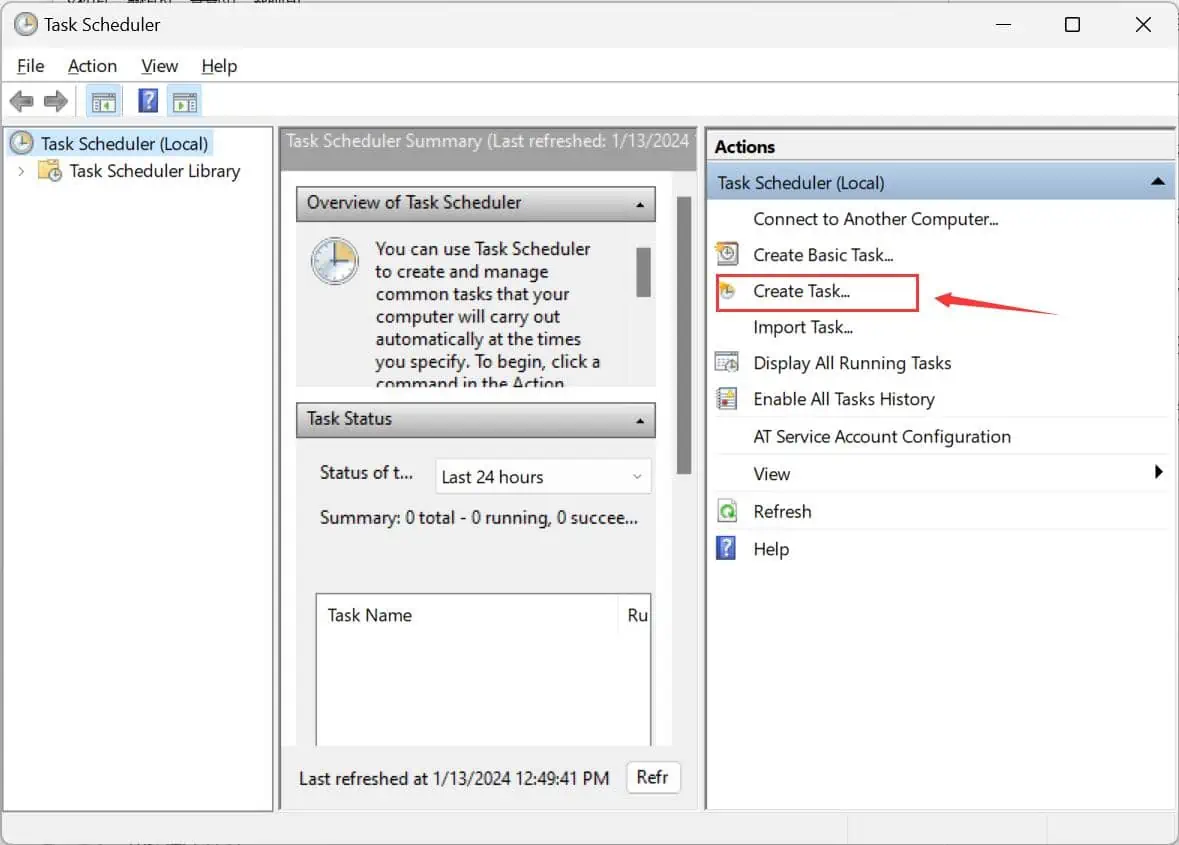
2. In the left taskbar, select the “Create Task” option to create a new task.
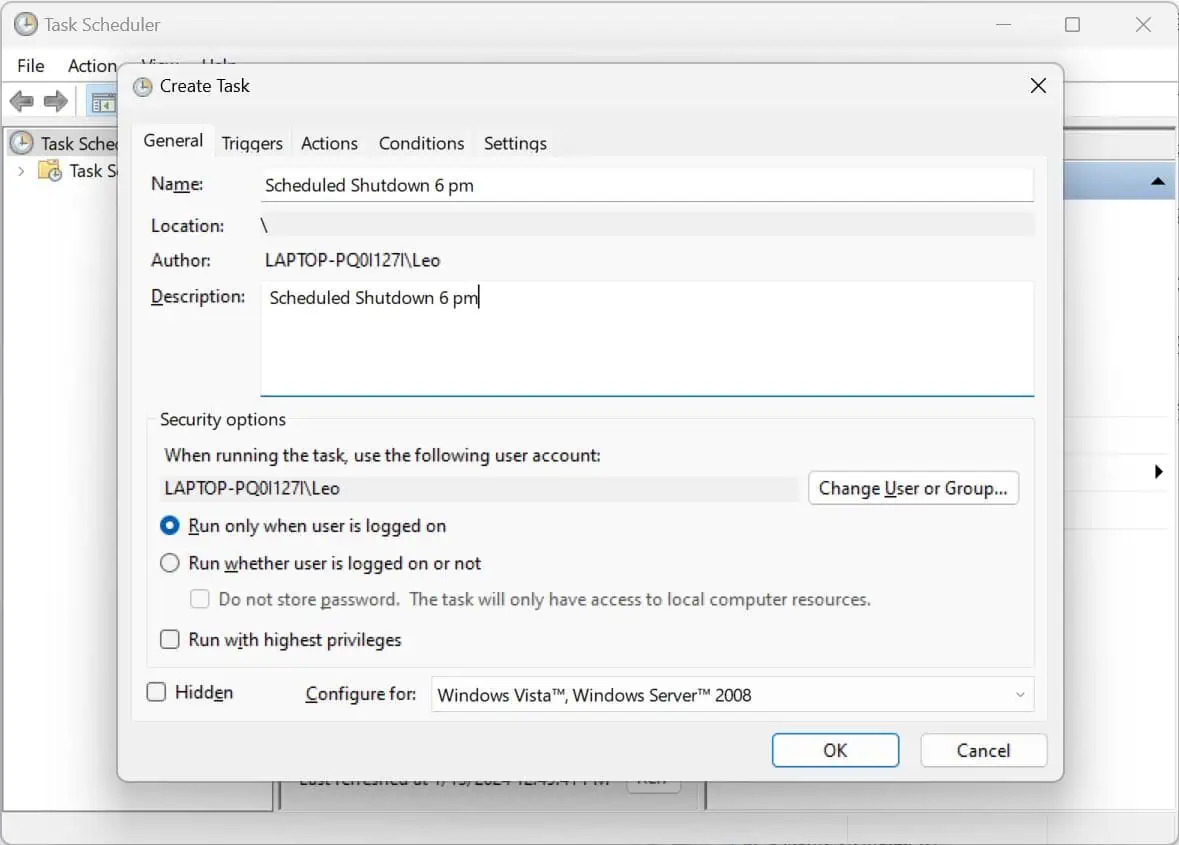
3. In the “General” tab, enter the name and description for the task, such as ‘Scheduled Shutdown 6 pm’, and select the user account under which the task should run.
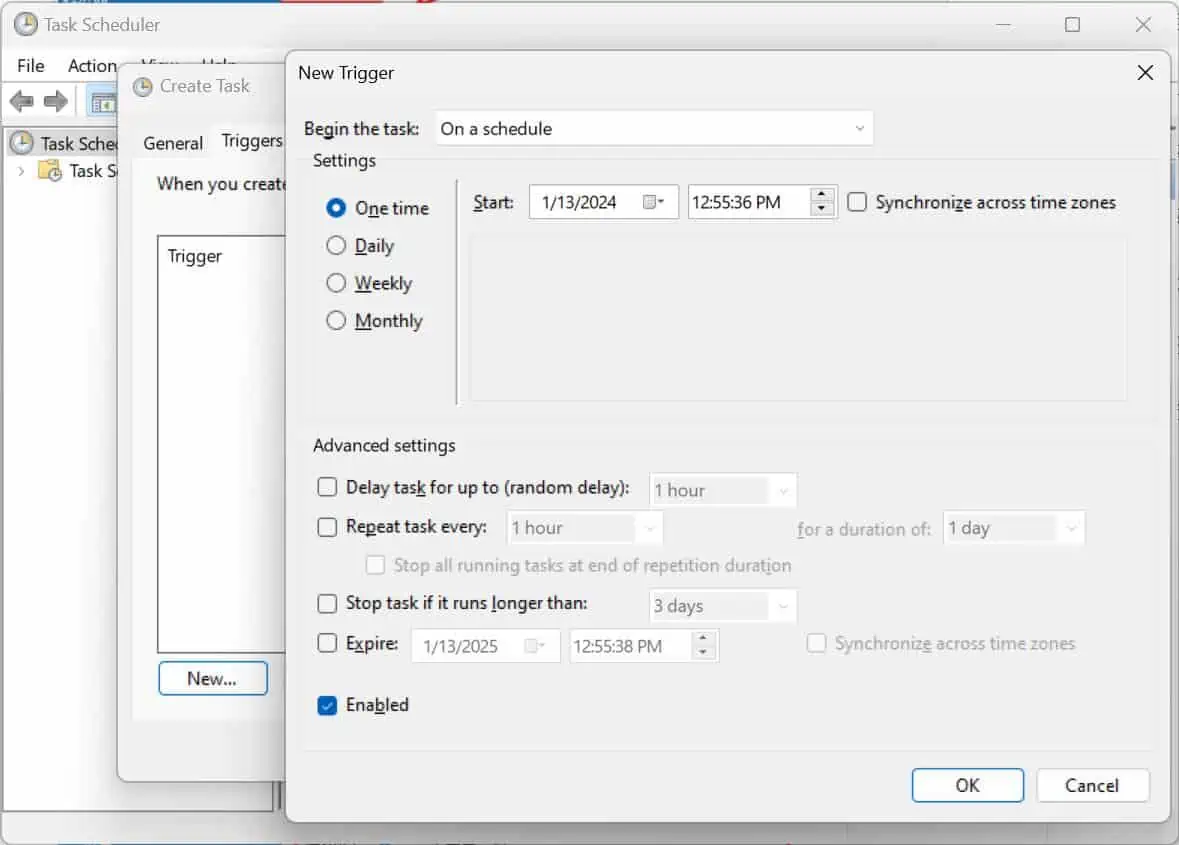
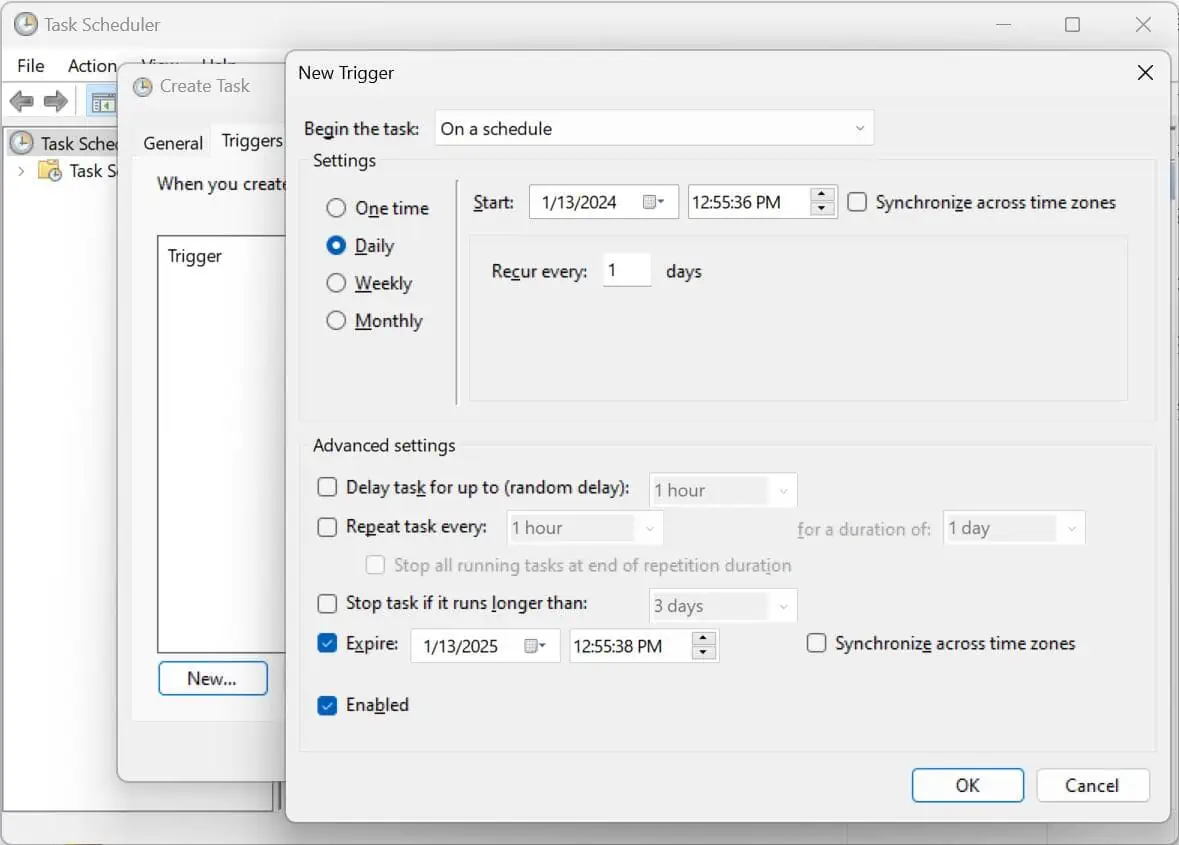
4. Switch to the “Triggers” tab, click the “New” button, and configure the trigger conditions for the task. For example, choose “Daily” or “Weekly” at a specific time, based on your specific requirements.
5. Switch to the “Actions” tab, and click the “New” button to define the actions the task should perform.
6. In the pop-up “New Action” dialog box, choose the program or script to run. Here, we use the shutdown /s command, so input the executable file path and add “/s” in the parameters to set the shutdown option.

After selecting “Finish,” you can add the automatic scheduled shutdown task to the Windows 11 system. Following the above steps, Windows 11 will automatically shut down at the specified time, relieving you from concerns about forgetting to turn off the computer.


