
Microsoft plans to enable BitLocker encryption by default during the Windows 11 24H2 installation process. This will have two implications for users: it may impact hard drive performance, and without a decryption key, users could potentially lose relevant data.
Although the default BitLocker encryption in Windows 11 has only recently garnered attention from the media and users, Microsoft had already implemented this change in the Windows 11 Build 25905 preview update released in July 2023.
As cited from Microsoft’s official documentation: “Starting from this version, we adjusted the prerequisites for enabling device encryption (removing modern standby/HSTI verification and untrusted DMA port checks) to automatically enable it when installing Windows 11 from scratch.“
This article introduces two methods to disable BitLocker encryption during installation, giving users options based on their needs.
01
Modify Through the Registry
After the machine is started, Windows 11 will prompt you to select the correct country or region. At this point, users can open the Windows Registry and modify it to prevent disk encryption.
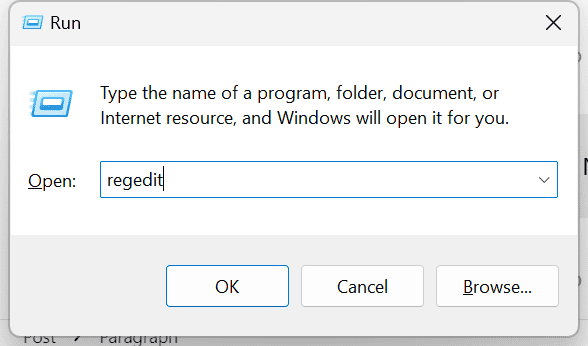
1. Press Windows + R (or Shift + Fn + F10), type Regedit, and press Enter to start the Registry Editor.
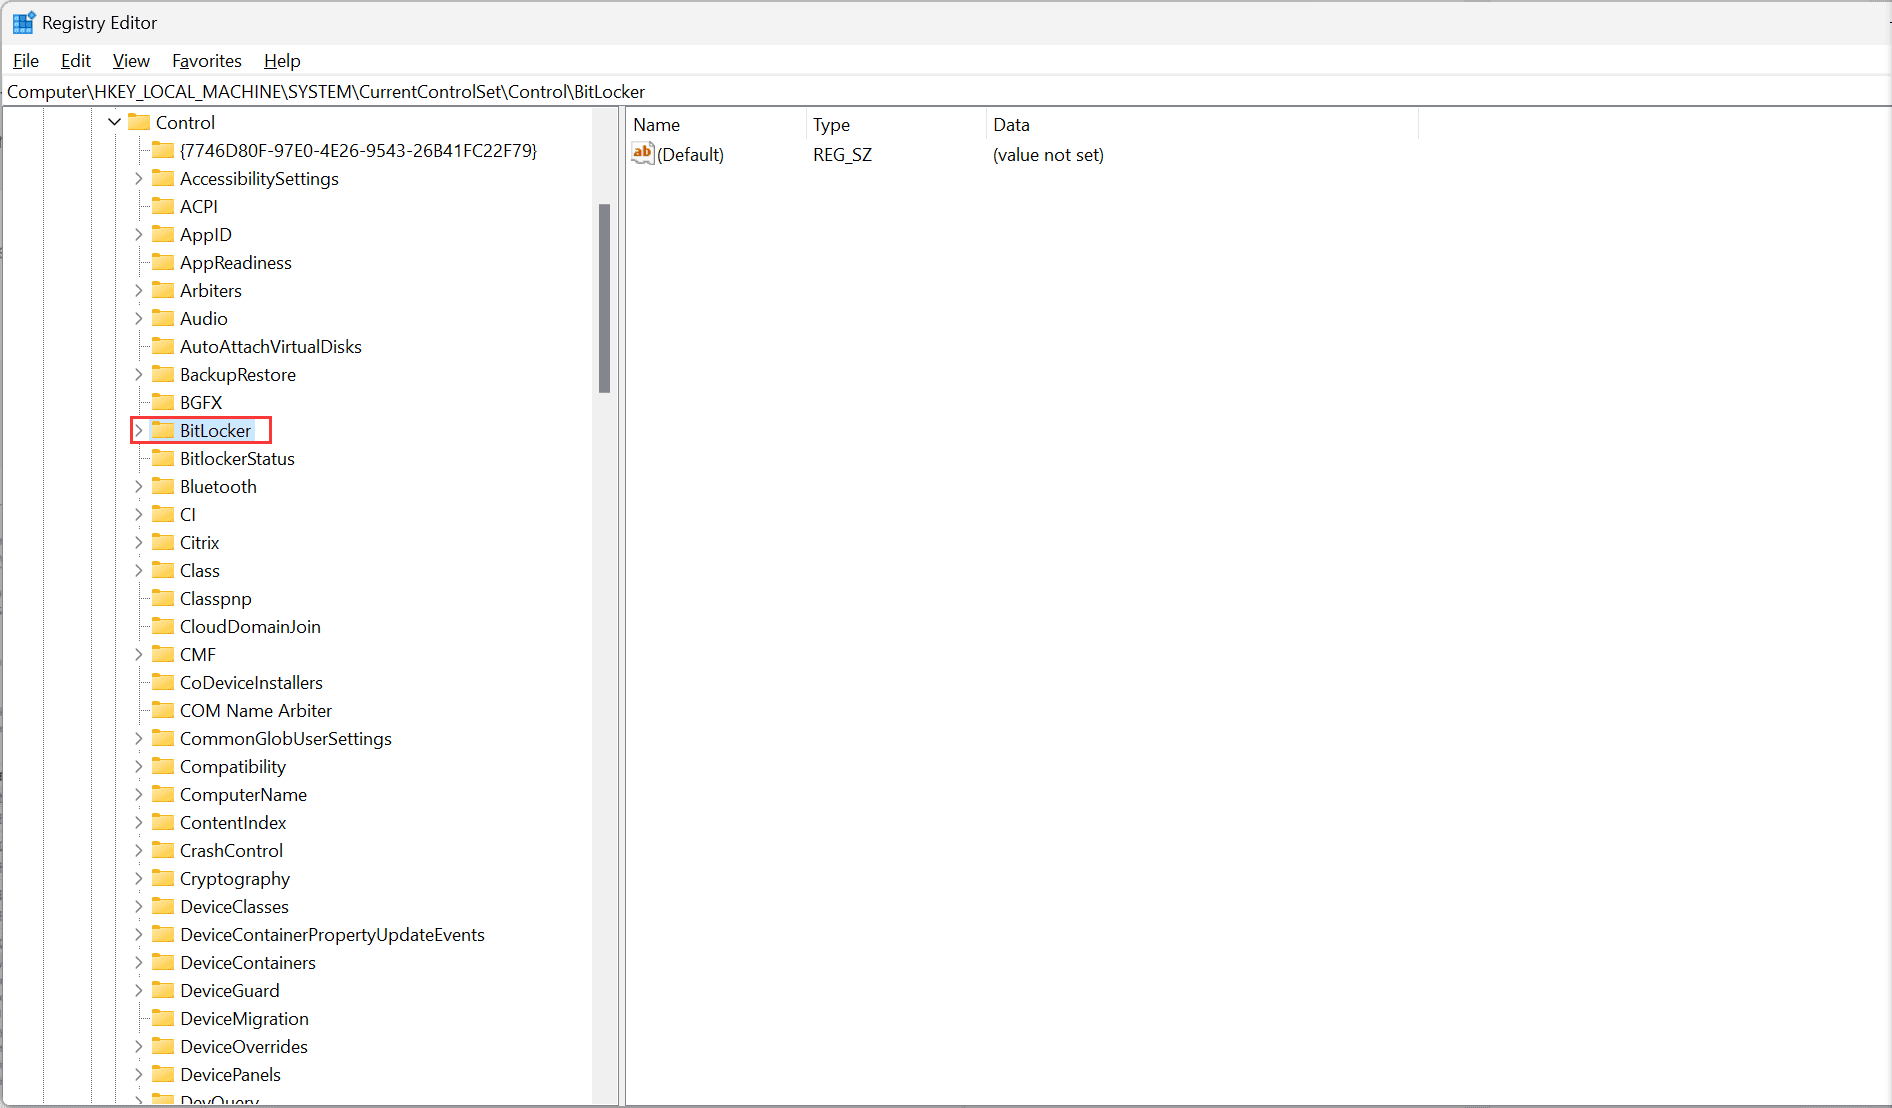
2. Open Computer\HKEY_LOCAL_MACHINE\SYSTEM\CurrentControlSet\Control\BitLocker and right-click on the BitLocker key (folder).
3. Select New > Dword (32-bit) Value and rename it as PreventDeviceEncryption.
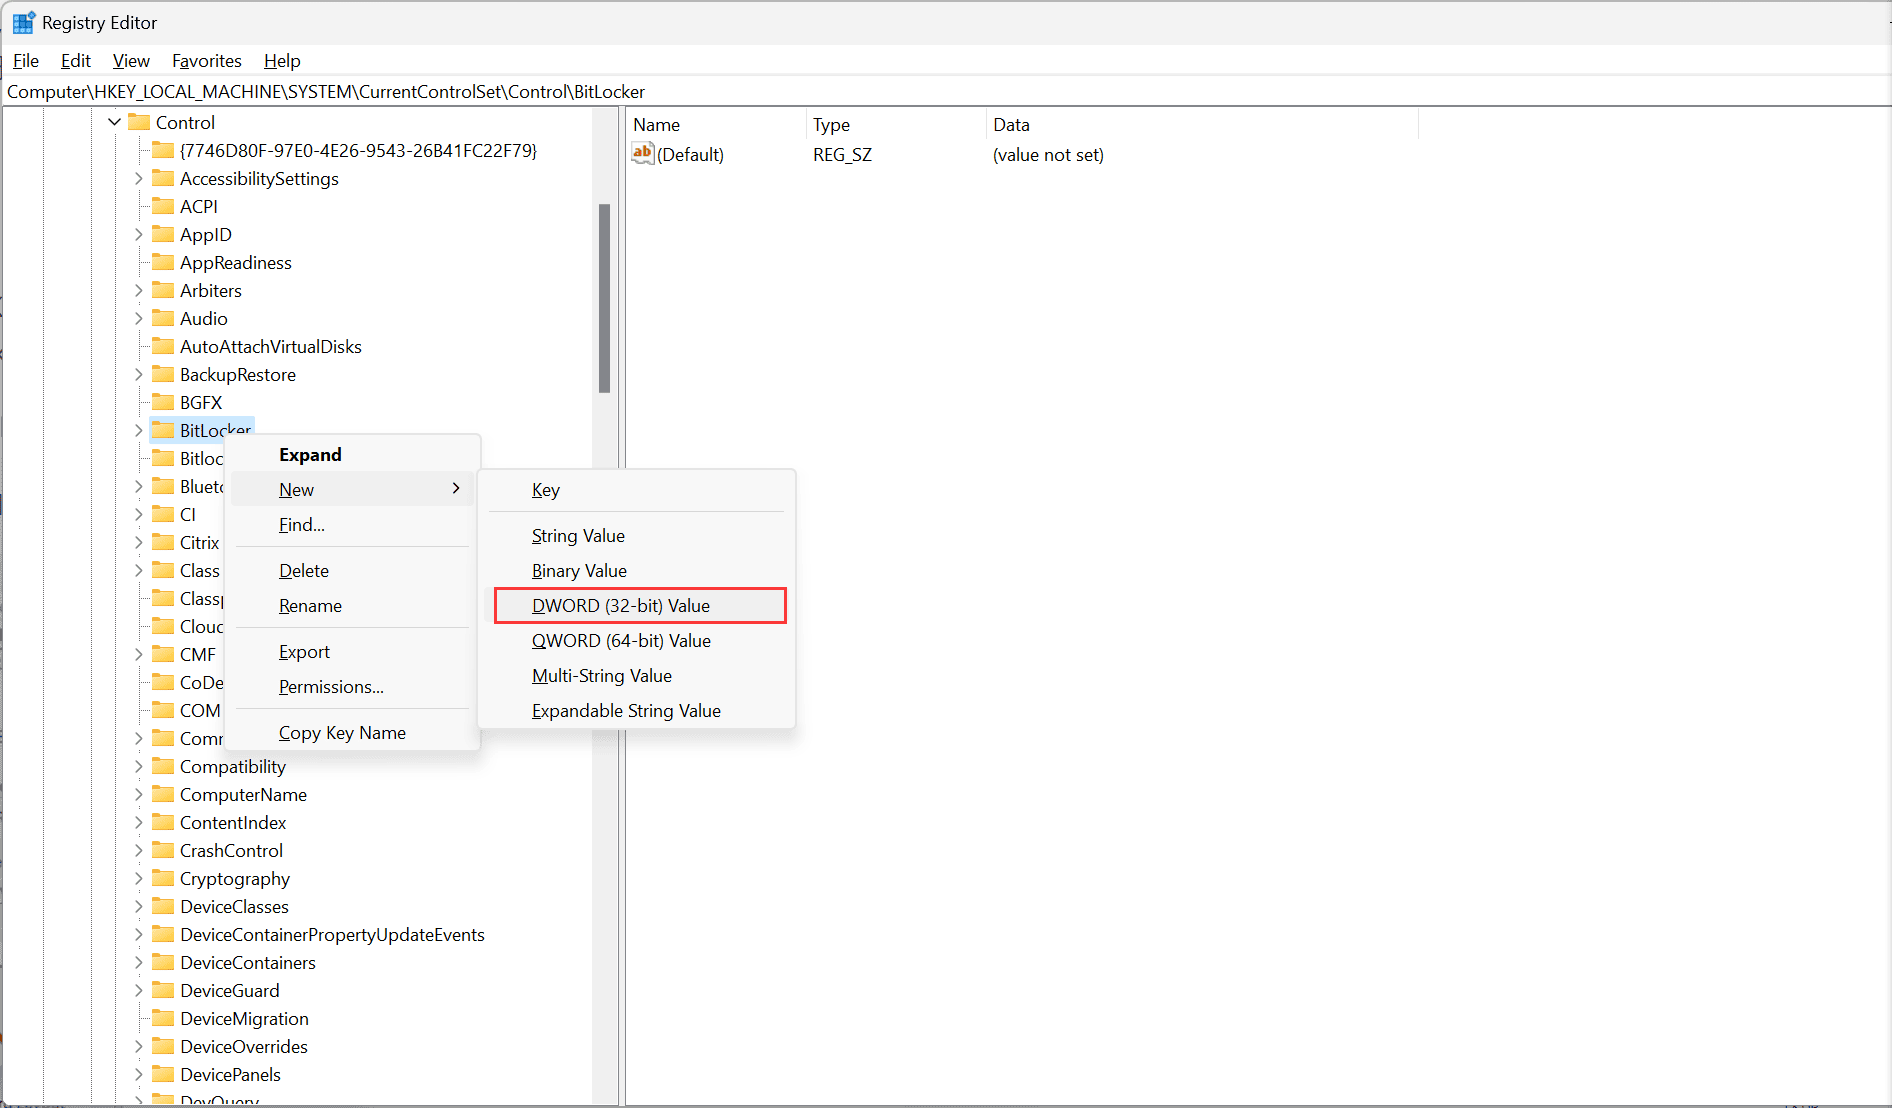
4. Open the newly created value and change its Value data from 0 to 1.
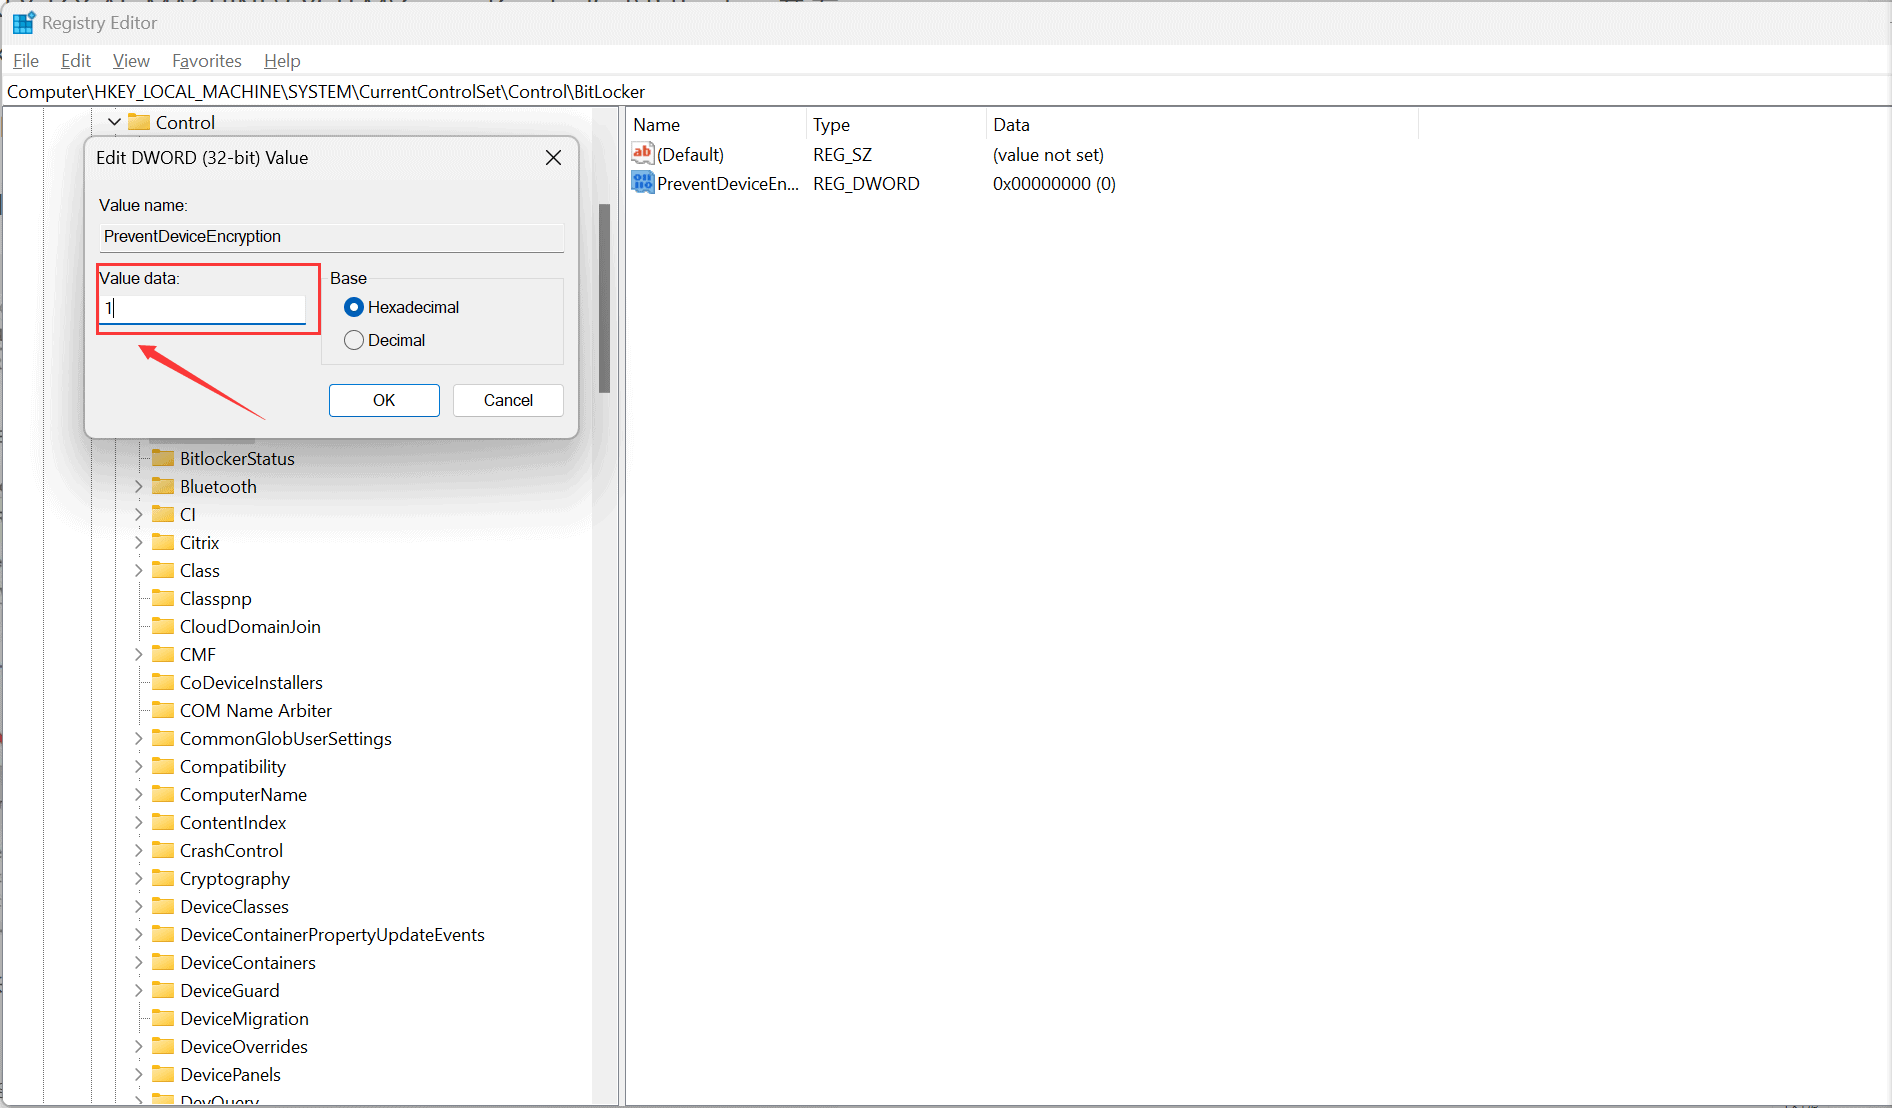
5. Close the editor and command prompt, then proceed with the installation as usual.
Windows Registry Editor Version 5.00

[HKEY_LOCAL_MACHINE\SYSTEM\CurrentControlSet\Control\BitLocker]
"PreventDeviceEncryption"=dword:00000001

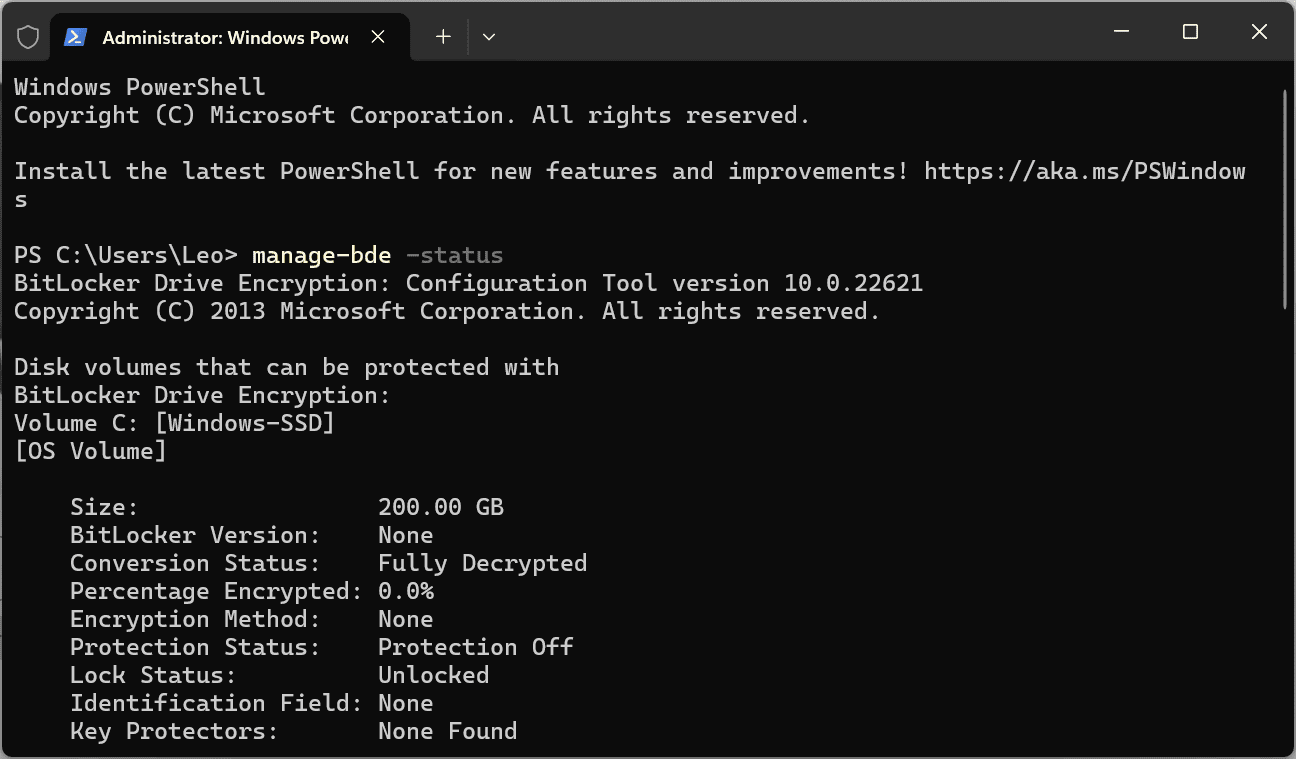
If users want to check the disk encryption status, please start the Command Prompt as an administrator and type manage-bde -status.
02
Modify Windows 11 image
You will need to use an imaging tool like Rufus. Here’s an example using Rufus:
1. Download Rufus from the official website. (https://rufus.ie/en/)
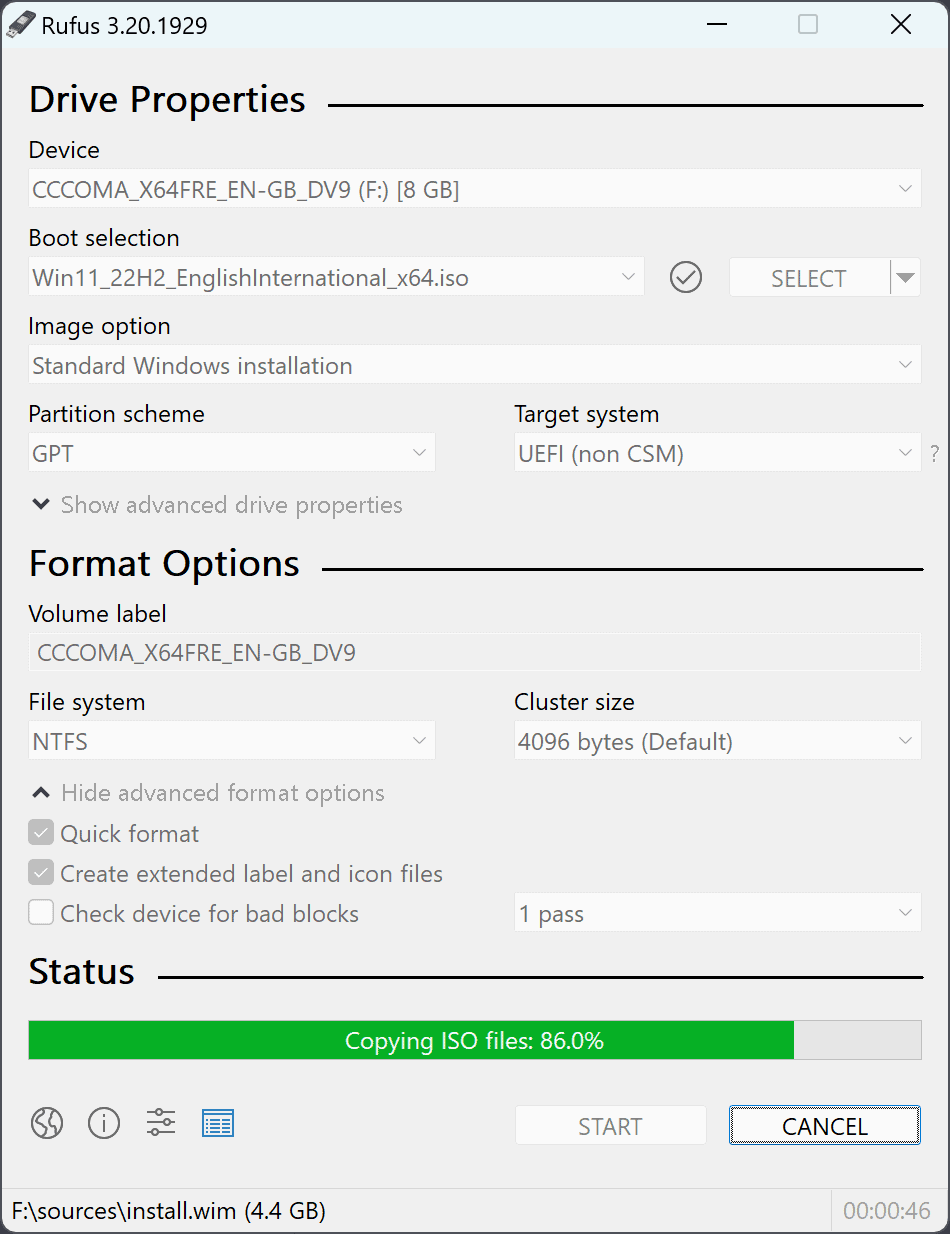
2. Obtain a Windows 11 image from the official website or the Media Creation Tool. (https://www.microsoft.com/software-download/windows11)
3. Insert a USB drive, select the image, and click “Start.”

4. Rufus will prompt you to select some options to improve your user experience. At the bottom, check the box for “Disable BitLocker automatic device encryption.”

5. After creating the bootable drive, install Windows 11 as usual.
03
Bonus: How to disable device encryption and standard BitLocker encryption
① Turning off Device Encryption
1. Enter [Device Encryption Settings] in the Windows search bar, and then tap [Open].
2. In the Device Encryption field, set [Off].
3. The system will remind you if you need to turn off device encryption, tap [Off] to turn off device encryption.
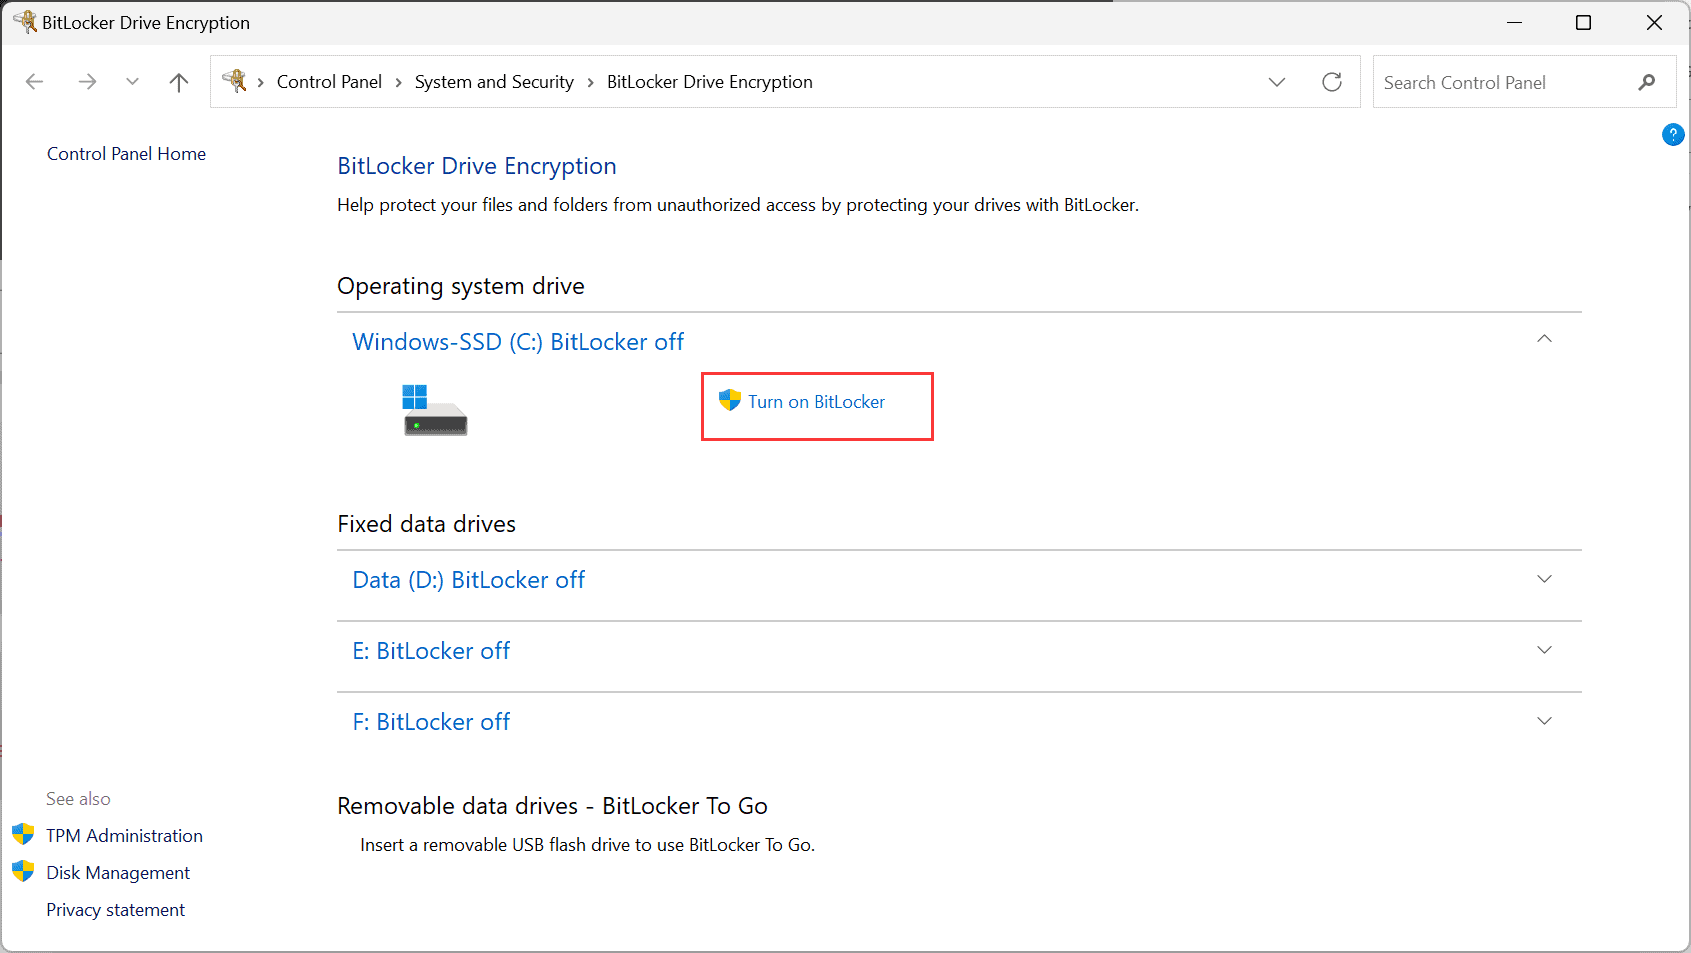
② Close the standard BitLocker
1. Type [Manage BitLocker] in the Windows search bar, and then click [Open].
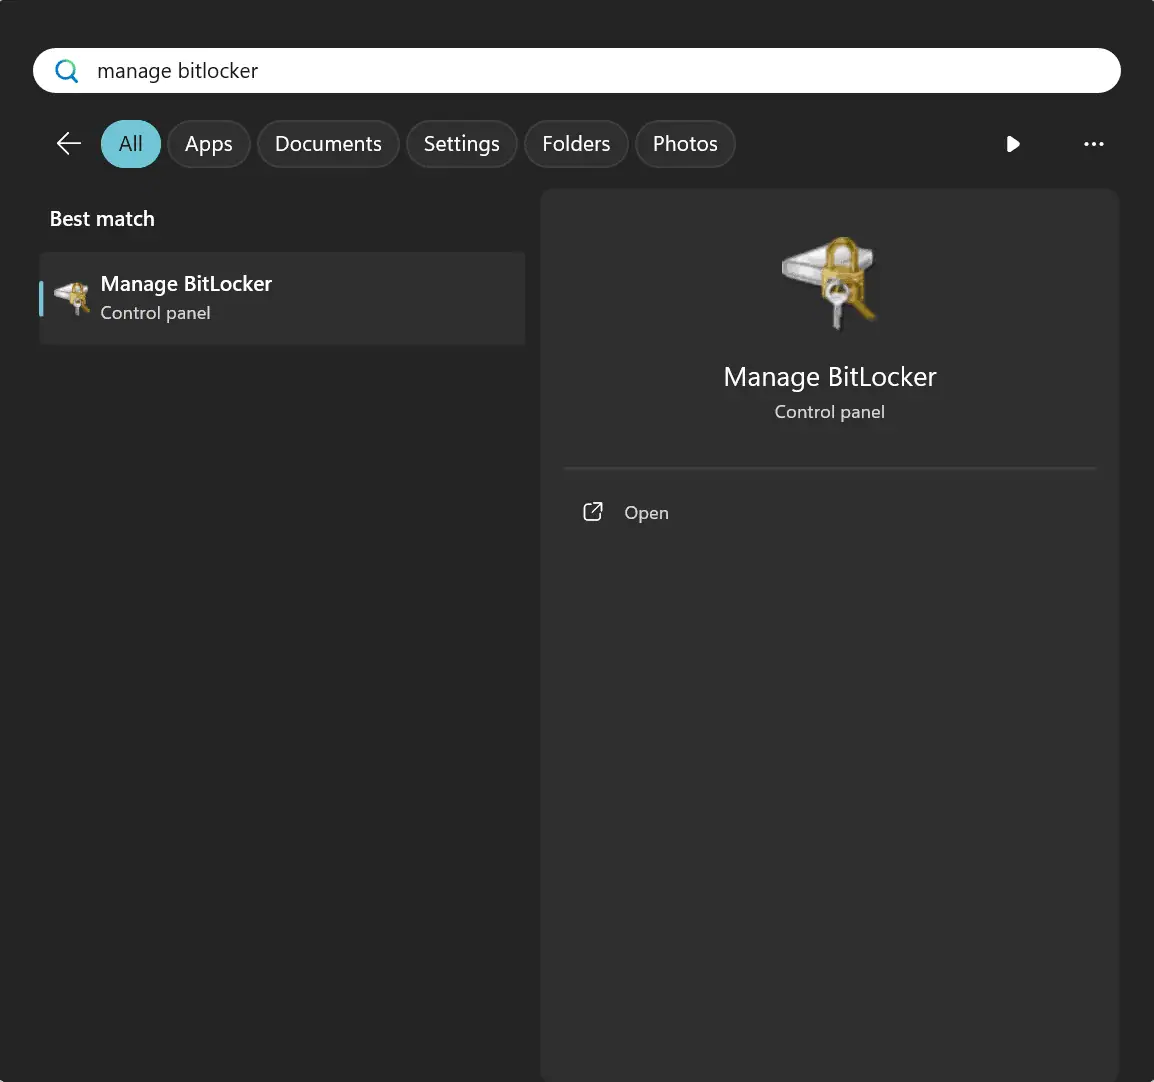
2. Click [Close BitLocker] on the disk drive you want to unencrypt with BitLocker. If the disk drive is currently locked, you need to click [Unlock Disk Drive] and enter the password before you can close BitLocker.
3. Confirm that you want to decrypt the disk drive, and then clicking [Close BitLocker] will begin to decrypt the disk drive, and your disk drive will no longer be protected.

Disclaimer: This article is created by the original author. The content of the article represents their personal opinions. Our reposting is for sharing and discussion purposes only and does not imply our endorsement or agreement. If you have any objections, please contact us through the provided channels.


