
01
Introduction to BIOS
BIOS stands for Basic Input Output System.
After a computer is assembled, its internals are just a collection of components that cannot communicate with each other. BIOS acts as a bridge between the software and hardware at this point.
02
Basic Function of BIOS
For the average user, the basic function of BIOS is to perform a self-check of the computer system’s hardware and to boot the operating system.
So, once the operating system starts, we can say that the work of BIOS is done.
Within the BIOS, we can also adjust the boot order of storage media, enable or disable hardware, adjust the frequency parameters of CPU and memory (commonly known as “overclocking”), and more.
03
Practical Operation of BIOS
Let’s explain how to enter the BIOS on a computer.
Since BIOS is a program stored in the ROM chip on the motherboard, the method to access BIOS can vary due to different computer motherboards.
Generally, after pressing the power button of the computer, you need to press a specific key (see the image below) multiple times as soon as the computer screen appears to enter the BIOS interface.
The image below provides the keys you need to press continuously to enter BIOS for some common brands of machines, for reference only.
MB Brand
ASUS
GIGA
MSI
Biostar
SOYO
Rainbow
ASRock
Spartaca
ONDA
DS
PCASL
ELITE
Gamen
Foxconn
MAXSUN
YESTON
JETWAY
INTEL
JWELE
CTHIM
EPoX
SUPOX
Button
F8
F12
F11
F9
F12 or ESC
F11 or ESC
F11
ESC
F11
ESC
F10
F11 or ESC
F11 or F12
F12 or ESC
F11 or F12
F8
ESC
F12
F8 or ESC
F12
ESC
ESC
NB Brand
Lenovo
Acer
ASUS
HP
Thinkpad
Dell
HASEE
Toshiba
Samsung
IBM
Fujitsu
Haier
Founder
Tsinghua
MSI
Benq
GIGA
Gateway
eMachines
Sony
Apple
Button
F12
F12
ESC
F9
F12
F12
F12
F12
F12
F12
F12
F12
F12
F12
F11
F9
F12
F12
F12
ESC
Option
PC Brand
Lenovo
HP
Acer
Dell
HASEE
ASUS
Founder
Tsinghua
Haier
Benq
Button
F12
F12
F12
ESC
F12
F8
F12
F12
F12
F8
Note: For some non-branded computers, you can also try pressing the “Delete” key continuously after turning on the machine as soon as the screen appears.
After entering, you will see the interface (taking an old Lenovo model as an example).
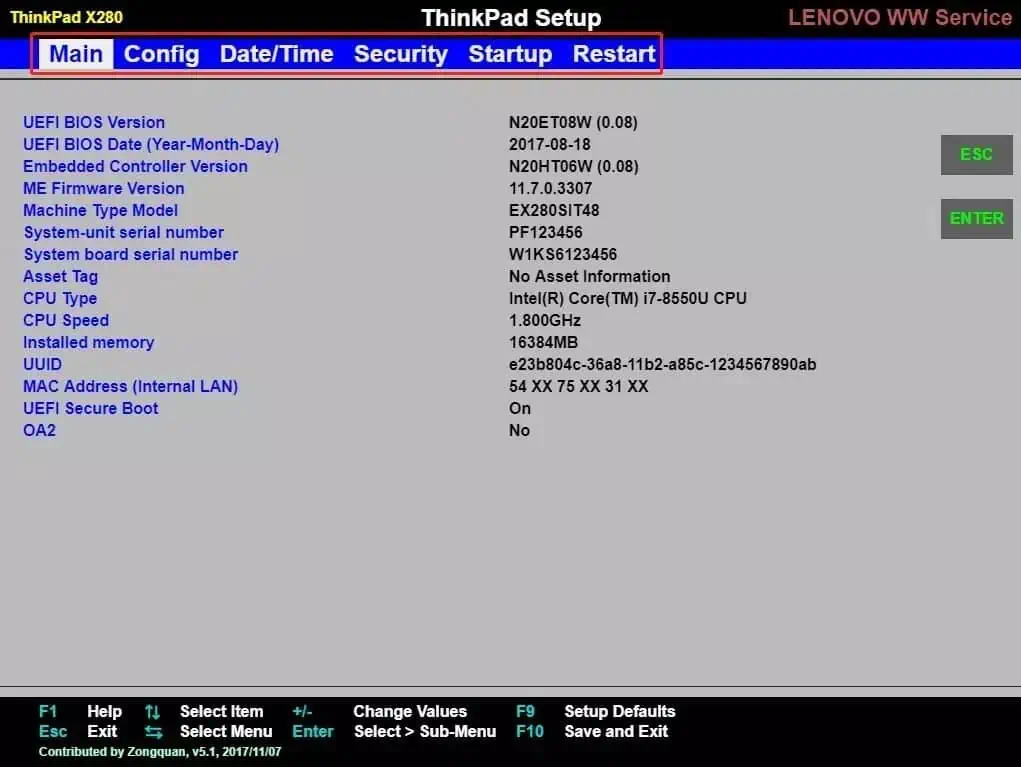
The red box in the image is for selecting different tabs. You can use the keyboard’s “←” and “→” keys to switch between tabs.
- The first tab “Main” displays specific information about the machine.
- The second tab “Config” is mainly for setting up the machine’s hardware devices, including network and USB settings, among others.
- The third tab “Date/Time” is mainly for changing the time and date.
- The fourth tab “Security” is primarily for managing various password settings, such as machine account passwords, USB port permissions, etc.
- The fifth tab “Startup” allows us to set the boot order of storage media. This feature is used when reinstalling the system from a USB drive.
- The sixth tab “Restart” mainly serves to restart the computer, saving all the settings made in BIOS beforehand.
If you have successfully set up the BIOS, do not forget to save the settings. Otherwise, all the settings made before will be in vain.
04
Showcase of New BIOS
The BIOS shown above is relatively old. Currently, some newer motherboards on the market come with a BIOS that has a custom-designed interface.
Some BIOS interfaces even allow direct manipulation with a mouse, making it more user-friendly.
The following two images showcase the latest BIOS interfaces from two different motherboard brands.
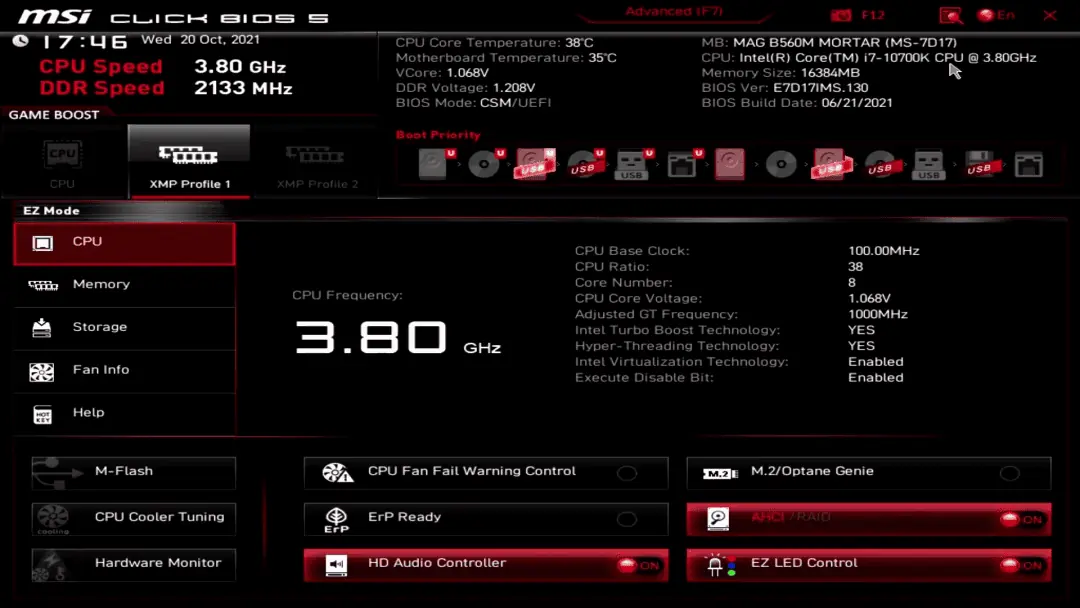
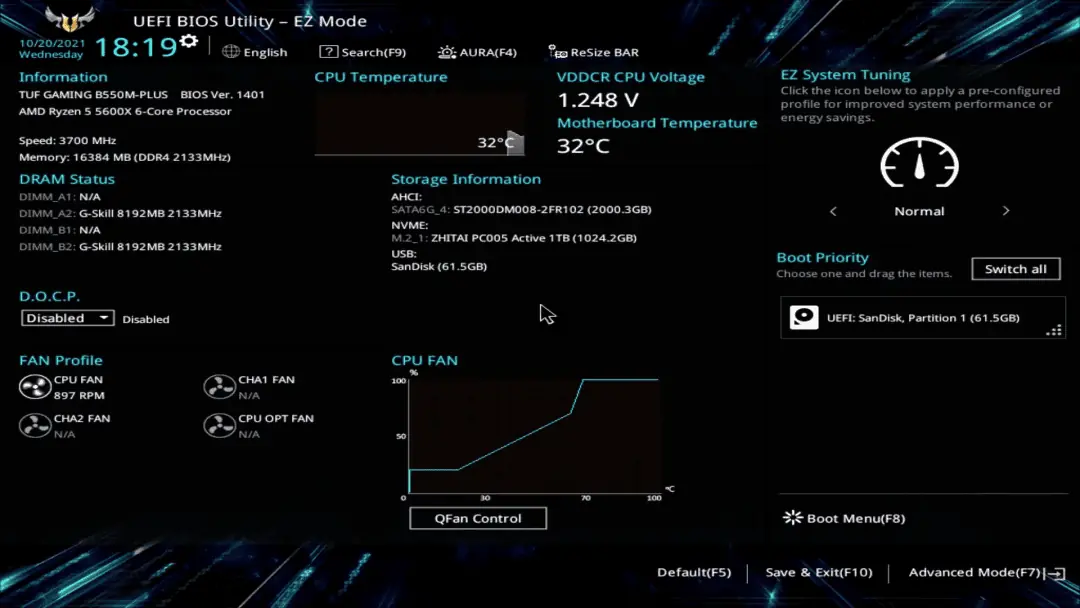
Although these two new BIOS interfaces include some new features (such as adjusting fan speed), their basic functions remain largely the same as the older versions.
05
Worth Mentioning
Many new machines now come with a new scheme called UEFI, gradually replacing BIOS.
UEFI improves on the traditional BIOS by speeding up hardware initialization and system booting, making it more streamlined and fast.
Compared to the traditional BIOS, UEFI is more multifunctional, convenient, and compatible.
🔔Friendly Reminder
Computers we purchase now usually come with the BIOS already optimally set by the manufacturer. So under normal circumstances, there is no need to adjust the BIOS.
If you do need to adjust the BIOS yourself, remember to back up your computer files in advance. Avoid making random changes to settings you are unfamiliar with.
Improper settings can even cause the machine to fail to boot.
Related:

Disclaimer:
- This channel does not make any representations or warranties regarding the availability, accuracy, timeliness, effectiveness, or completeness of any information posted. It hereby disclaims any liability or consequences arising from the use of the information.
- This channel is non-commercial and non-profit. The re-posted content does not signify endorsement of its views or responsibility for its authenticity. It does not intend to constitute any other guidance. This channel is not liable for any inaccuracies or errors in the re-posted or published information, directly or indirectly.
- Some data, materials, text, images, etc., used in this channel are sourced from the internet, and all reposts are duly credited to their sources. If you discover any work that infringes on your intellectual property rights or personal legal interests, please contact us, and we will promptly modify or remove it.


