If you want to experience the new features of Win11 on an old computer, and if your old computer meets the minimum hardware requirements for installing Windows 11, and you don’t want to upgrade your computer configuration, you can try the following steps after installing the system to improve the smoothness of the system’s operation.

01
Minimum System Requirements and Your Computer
Your computer must meet the following minimum system requirements to achieve an excellent computing experience:
- Processor/CPU: 1 GHz or faster with 2 or more cores
- RAM: 4 GB. If your computer has less than 4GB of memory
- Storage: 64 GB or larger storage device.
- System Firmware: UEFI (Unified Extensible Firmware Interface, a modern version that supports PC BIOS) with Secure Boot.
- TPM: Trusted Platform Module (2.0).
- Graphics Card: Compatibility with DirectX 12 or higher with WDDM 2.0 driver.
- Display: High-definition (720p) diagonal display, 8 bits per color channel. If the screen size is less than 9″, the Windows user interface may not be fully visible.
02
Detailed Optimization Steps
The optimization approach involves disabling all unnecessary visual effects, background services, components, etc., to conserve system memory resources, save disk storage space, and ultimately improve system smoothness.
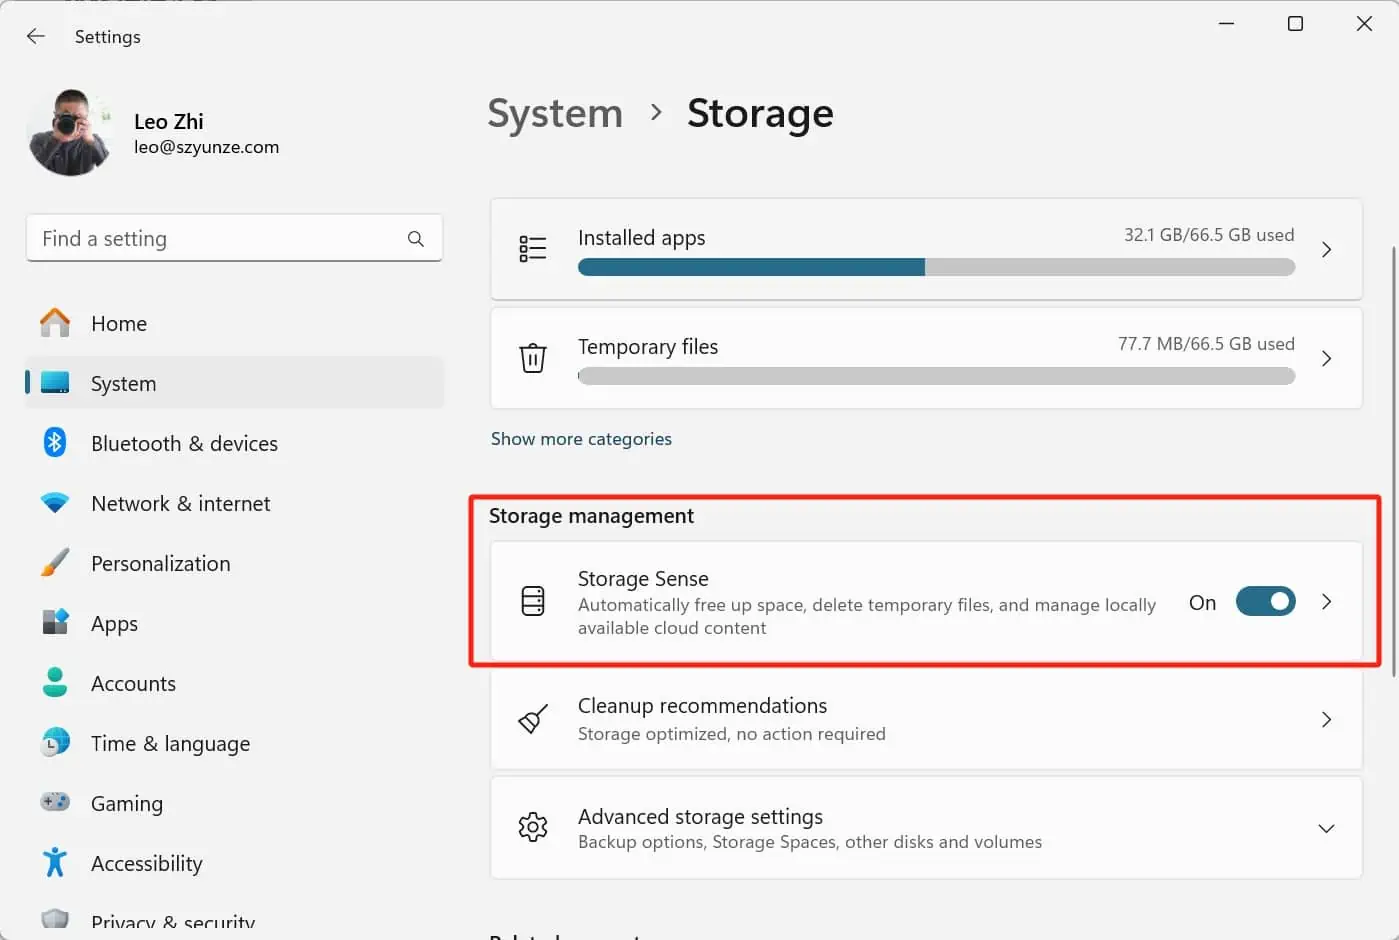
① Enable Storage Sense
Automatically clean system junk and temporary files regularly to save disk space.
Operation Path: Settings -> System -> Storage
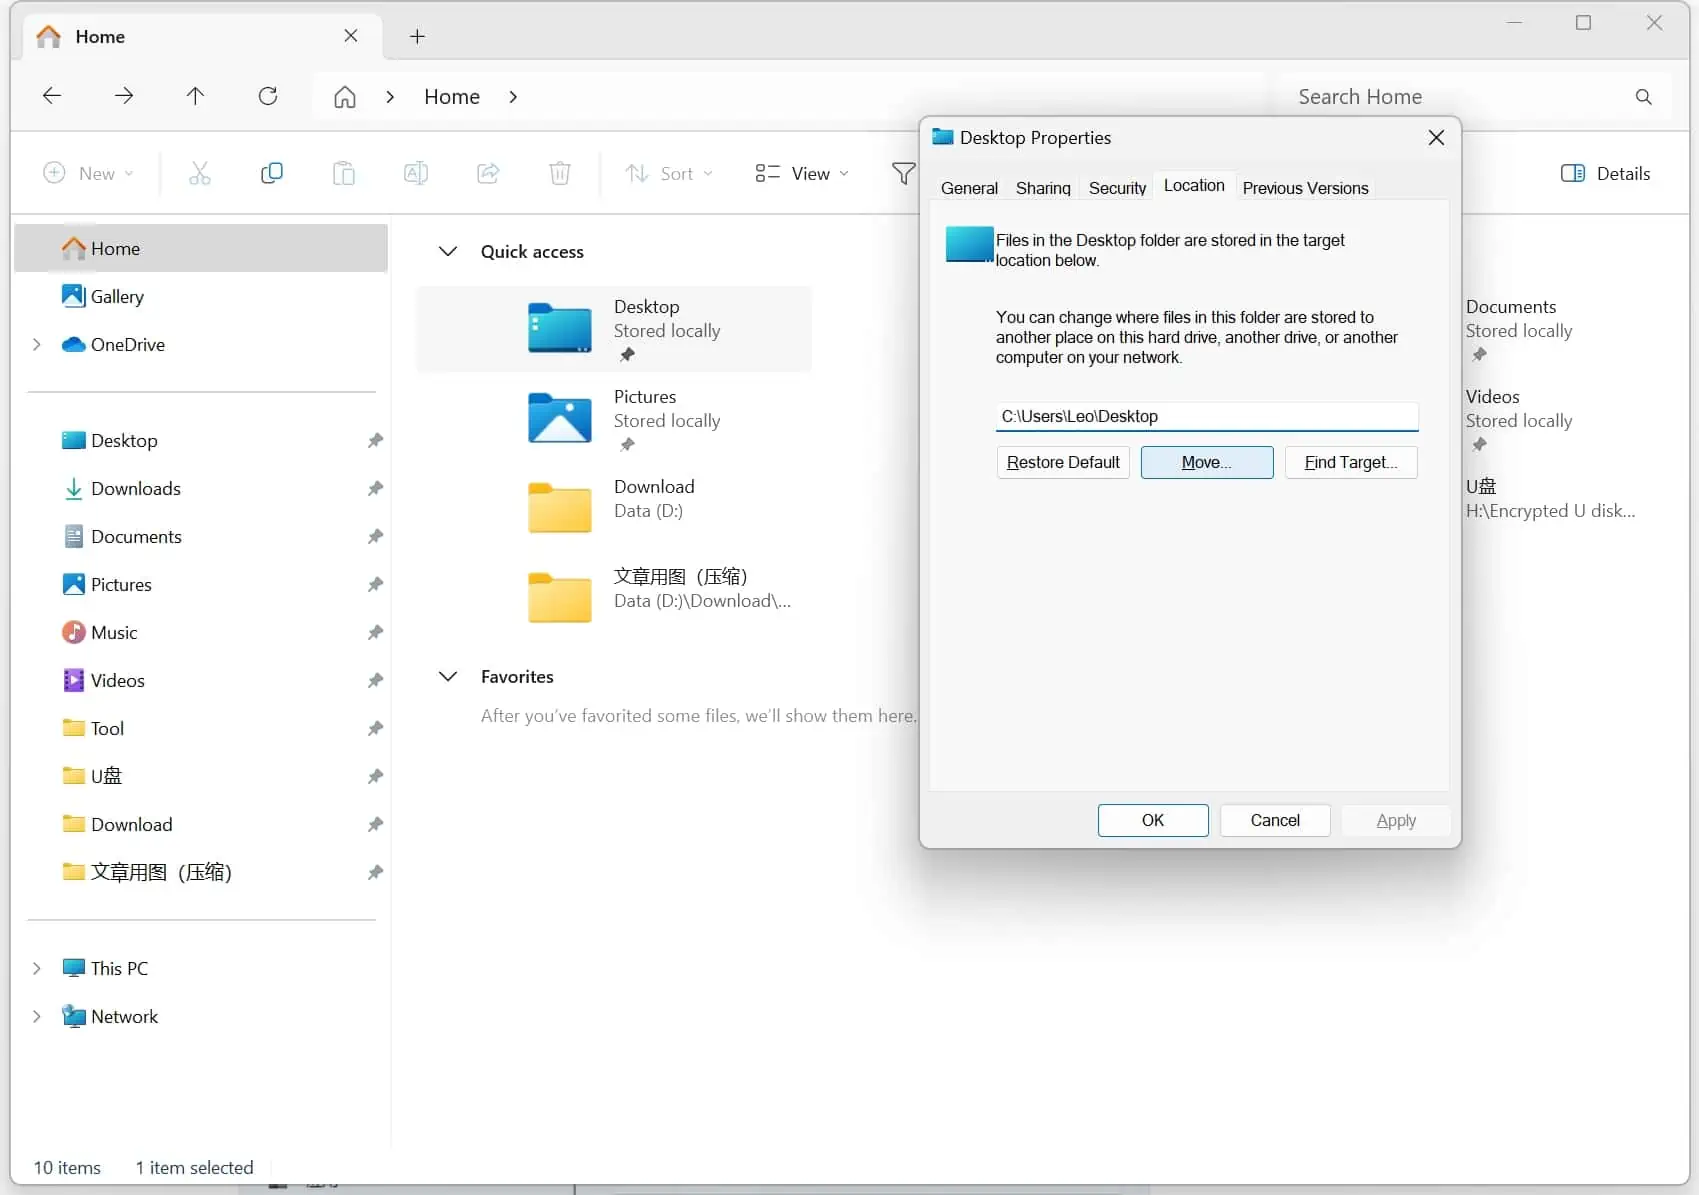
② Change Default File Save Location
Change the default save location of the Desktop folder to another disk partition, such as the D drive. This helps reduce the accumulation of files on the desktop, which can significantly impact system performance. Also, set the file download path, browser download path, and application installation path to default to a drive other than the C drive.
Operation Path: Open the user folder -> Select the Desktop folder -> Right-click Properties -> Location -> Move, to change it to the desired specific location.
③ Disable Transmission Optimization: Avoid resource consumption
Open the Start menu from the taskbar, locate Settings, choose ‘Windows Update,’ then open ‘Windows Update,’ and select ‘Advanced options’.
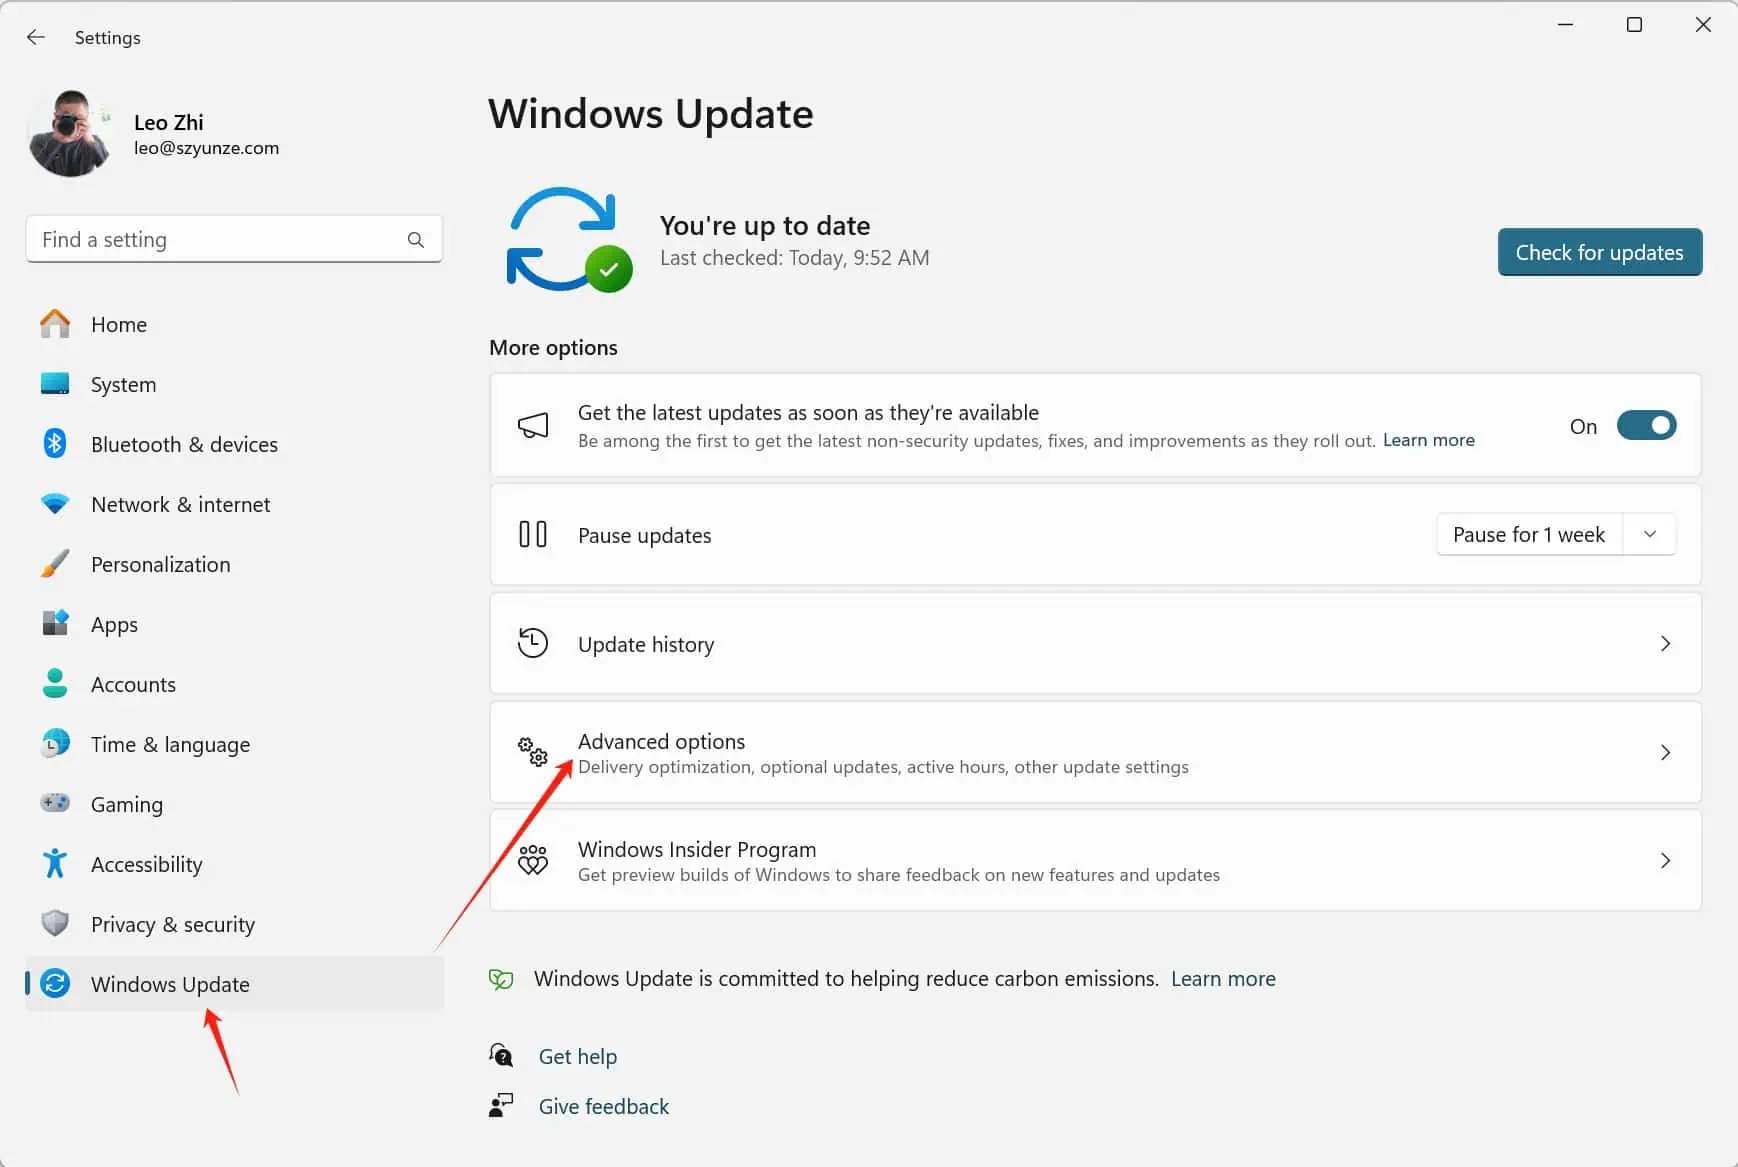
In the Advanced options, scroll down a bit until you find “Additional options.” There, you’ll see “Delivery Optimization.” Once you open “Delivery Optimization,” you can simply switch off this toggle.

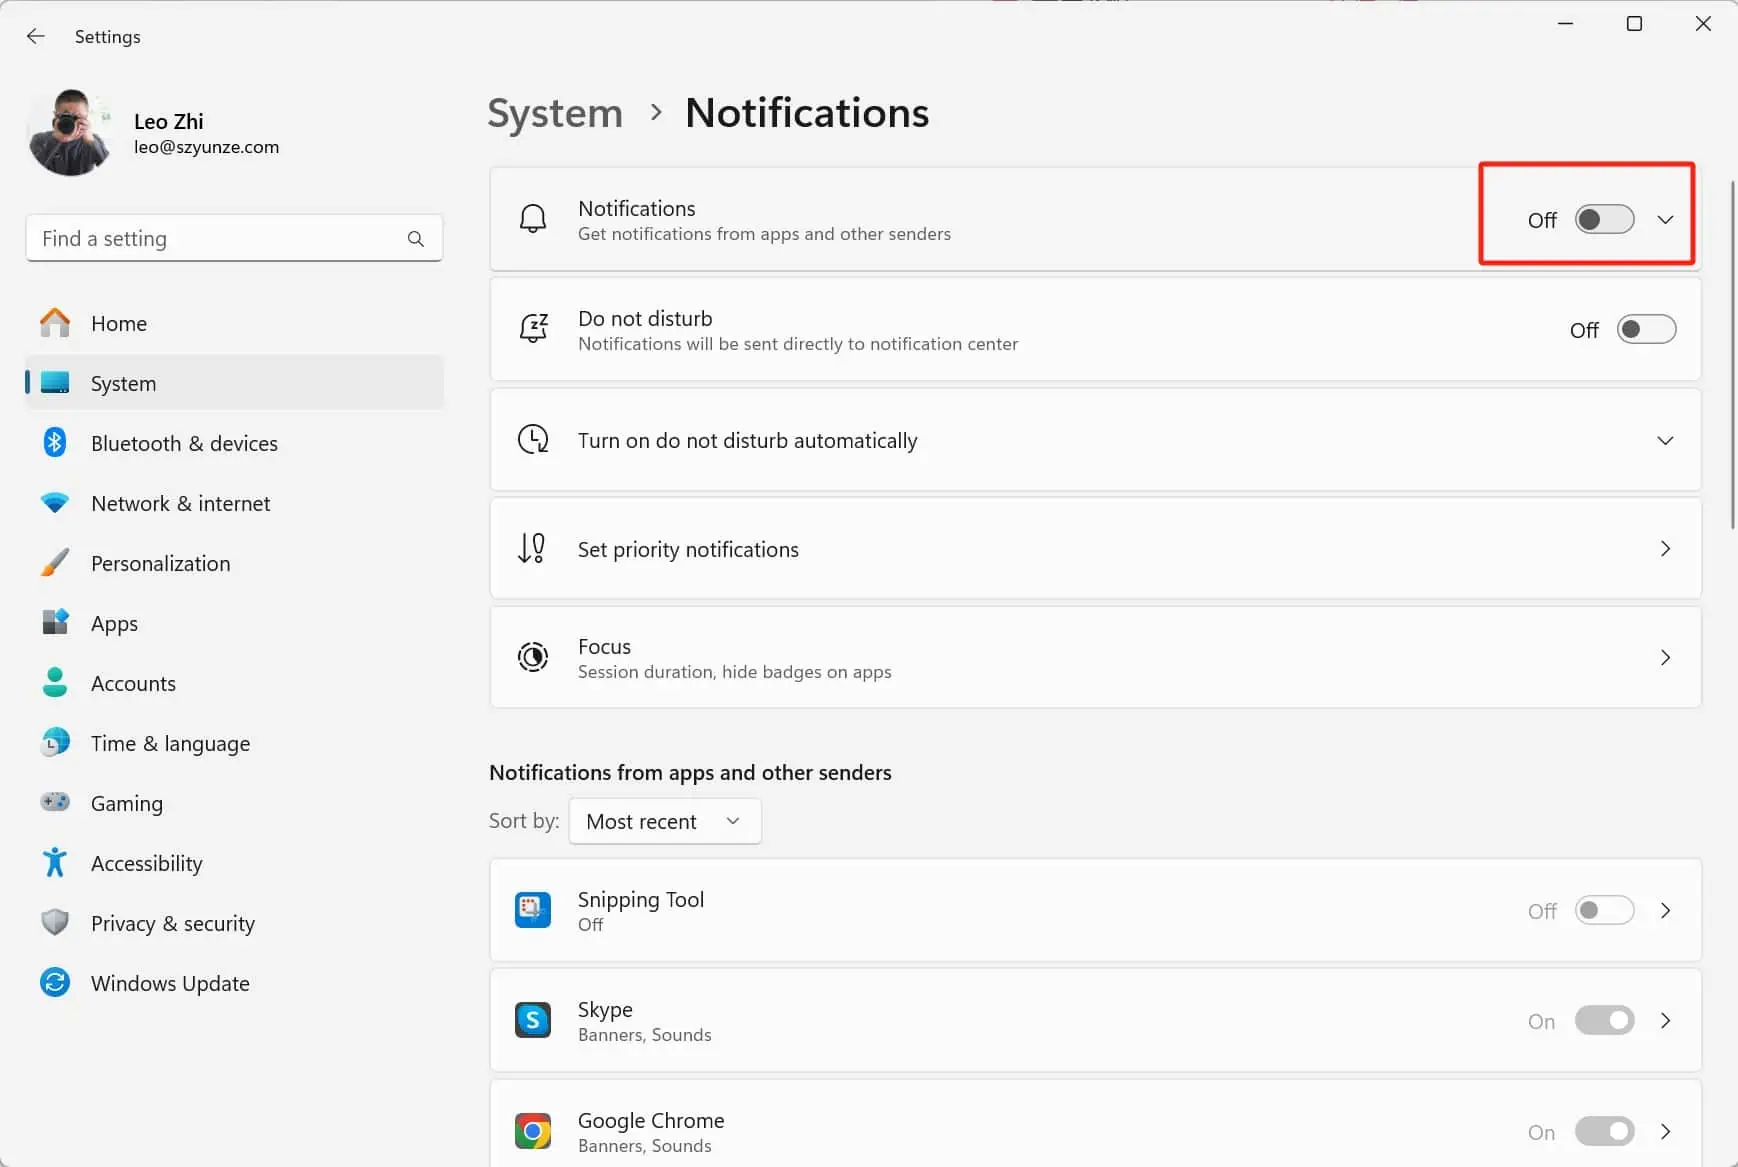
④ Disable Notifications
Prevent annoying pop-up notifications.
Operation Path: Settings -> System -> Notifications
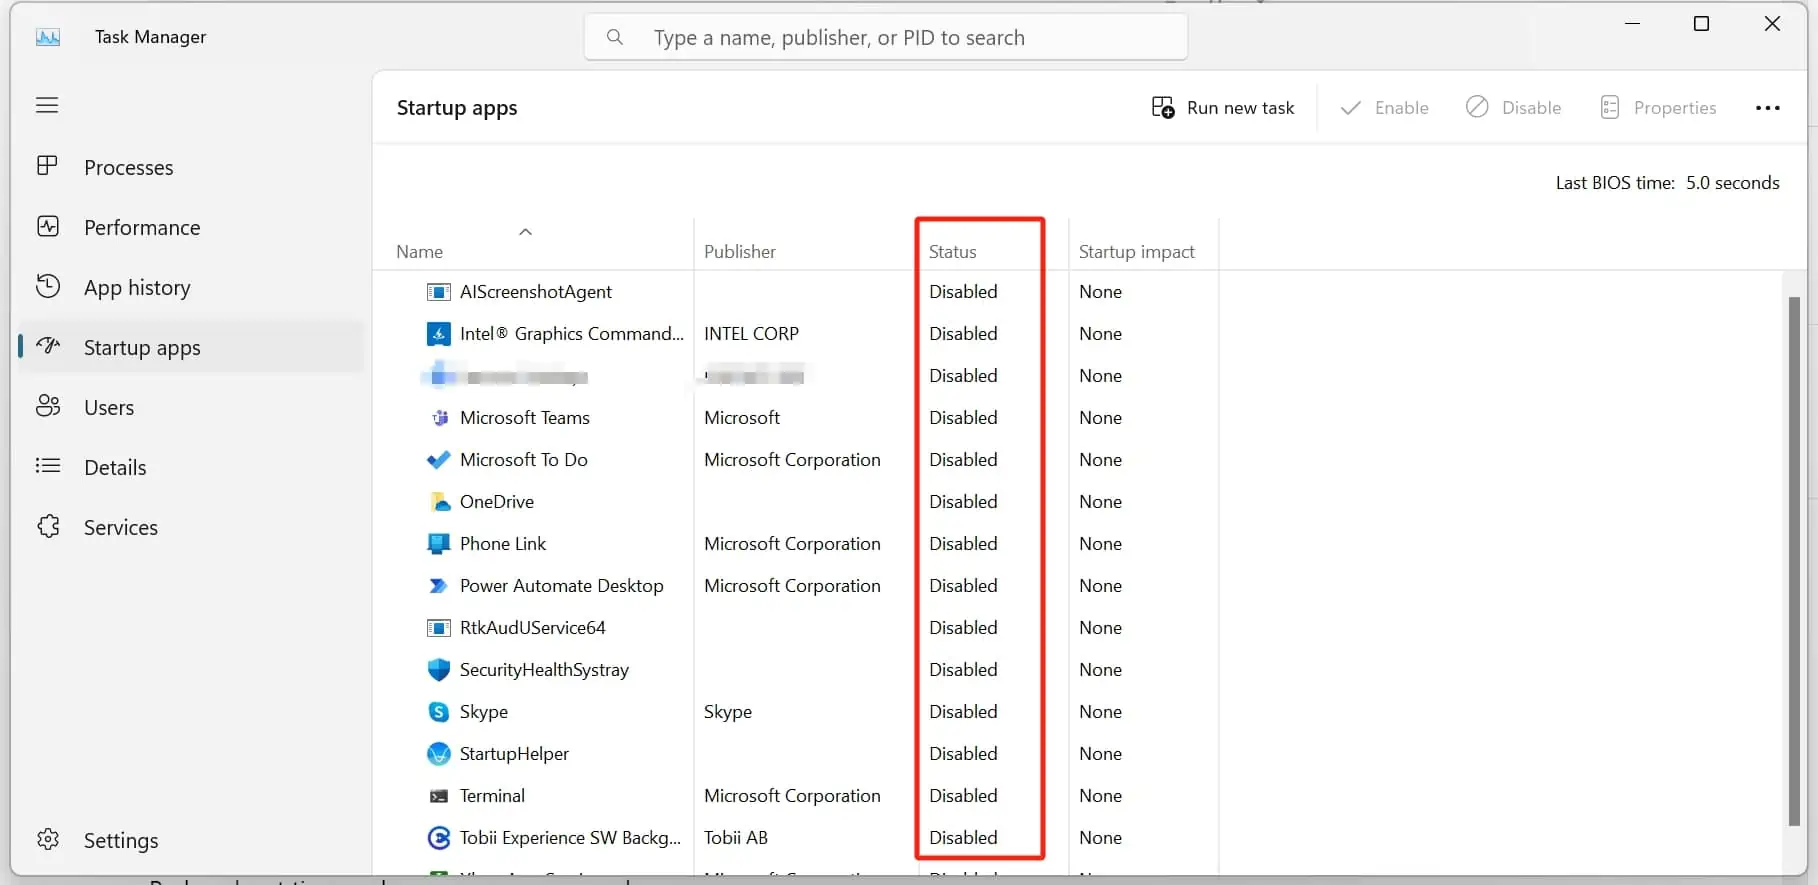
⑤ Disable Startup Programs
Reduce boot time and conserve memory and resources.
Operation Path: Task Manager -> Startup tab, select unnecessary startup items, and then disable them.
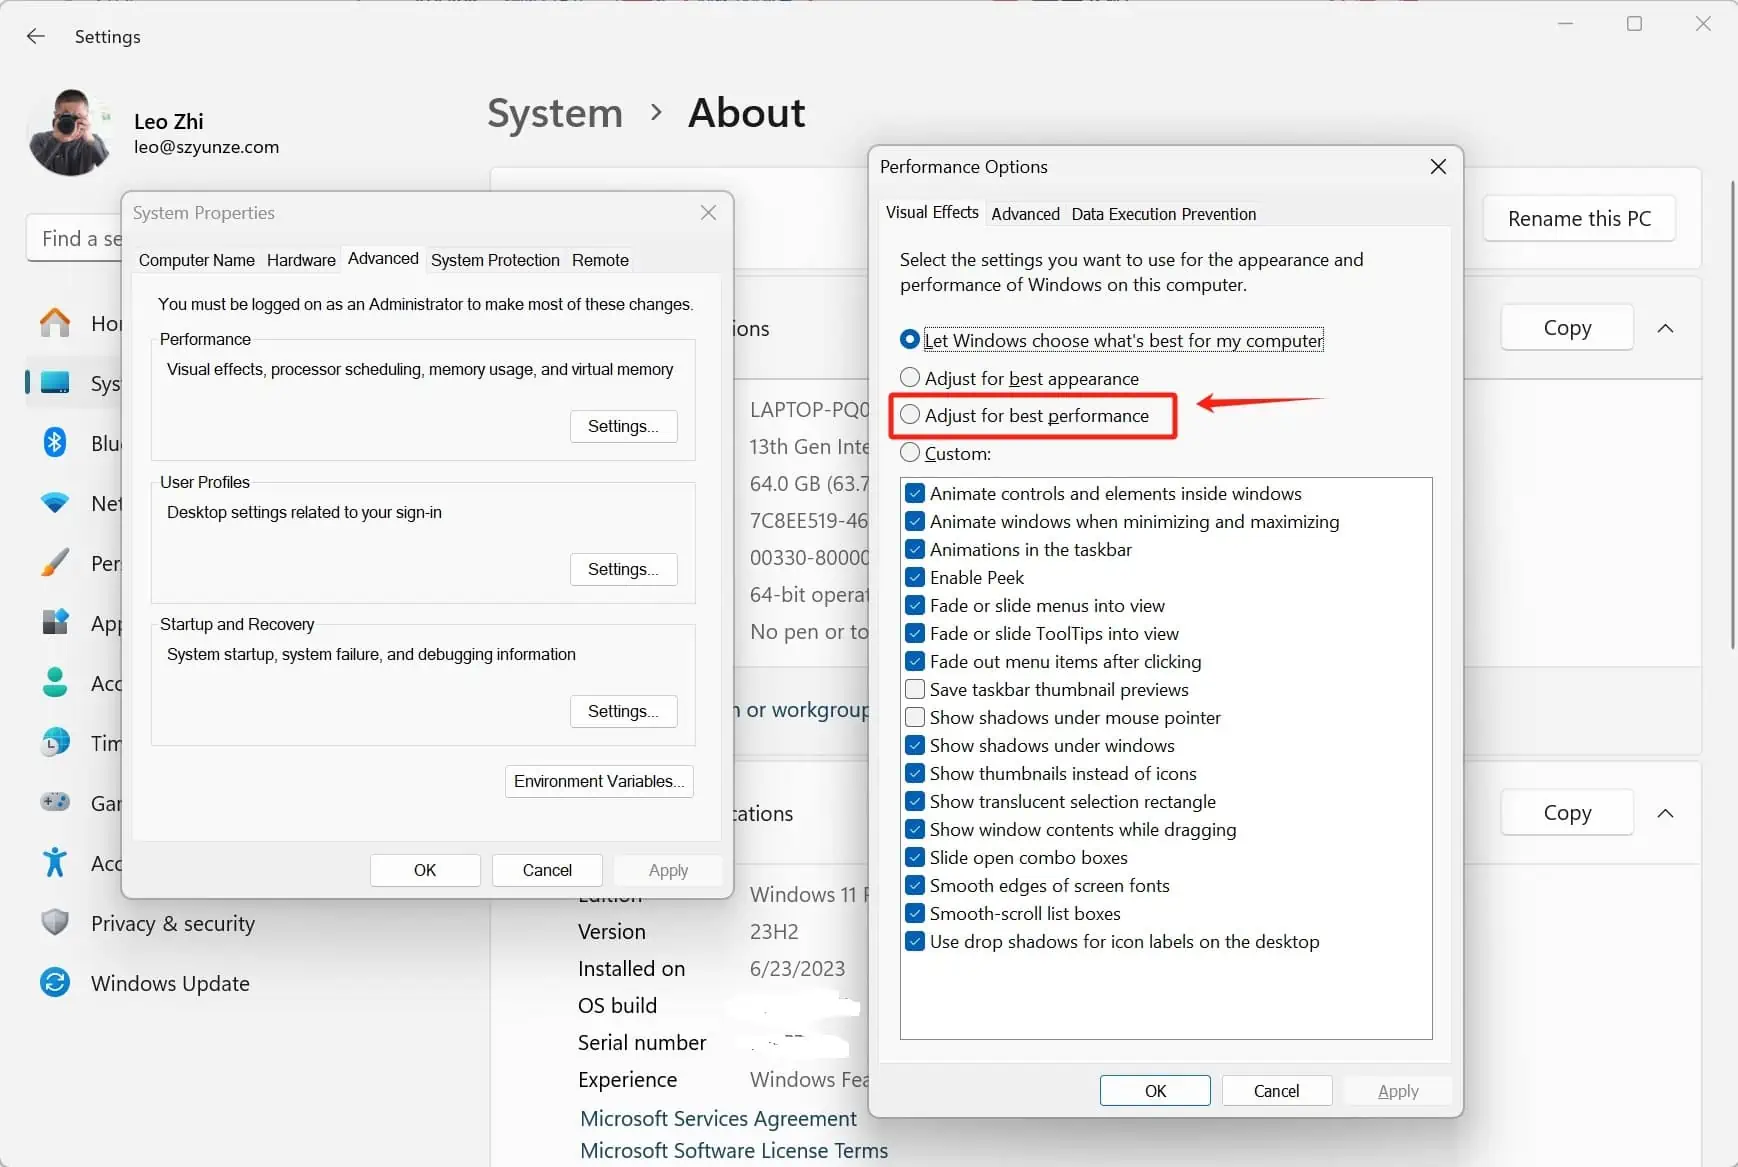
⑥ Activate Performance Mode and unleash greater performance.
Operation path: Settings—System—Advanced System Settings. Within settings, select to adjust to the best performance.
⑦ Disable VBS: Enhance performance.
While running, type ‘MSInfo32’ and press Enter. In the popped-up ‘System Information’ window, scroll down the list to find the ‘Virtualization-based Security’ item, which represents the VBS feature.
⑧ Set Power Options
Choose a high-performance power plan to maximize your computer’s performance.
Operation path: Settings—System—Power & Battery. Within the power mode, select to adjust to the best performance.
⑨ Turn off automatic updates
Operation path: Settings—System—Windows Update, toggle the switch to turn it off.


